Quantcast
Channel: Vibrant Shot Photography
Viewing all 44 articles
Browse latest View live

Natural Outdoor Portrait Retouching Tutorial

$
0
0

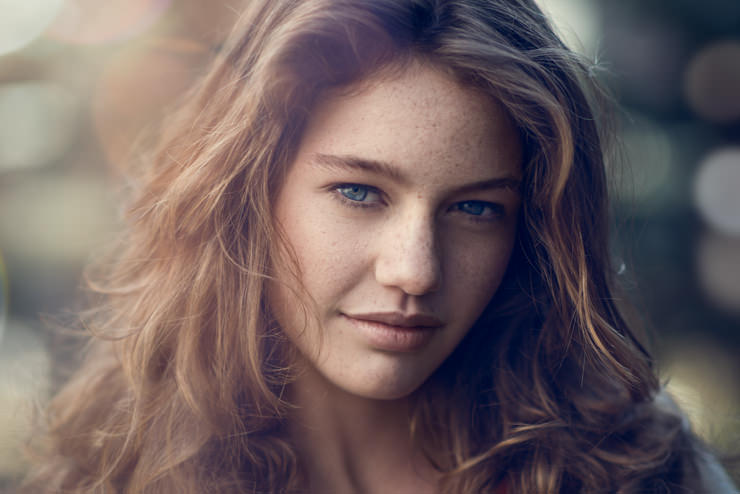
This is the second in a two part tutorial on retouching outdoor portraits and retaining a natural look using Adobe Photoshop. In the first part we looked at fixing hair and making the skin look great using frequency separation and dodging and burning. In this part we will be finishing the image with sharpening, toning, refining details like the eyes and hair as well as adding some styling elements like bokeh and lens flare. The final result is shown above.

The tutorial is beginner to intermediate in nature and I try to cover every technique in a step-by-step manner. Just about all the tools we’ll be using in this tutorial are available in Photoshop CS3 and onward. We won’t be using any plug-ins.

In this video we will spend a fair bit of time on adjusting the colours in the image so you may want to first review our tutorial on Mastering Color Adjustments before watching this one. If you’ve not yet watched part 1, it can be found here.

Thanks for watching and don’t forget to subscribe to my YouTube channel for more updates!

The post Natural Outdoor Portrait Retouching Tutorial appeared first on Vibrant Shot Photography.


We’re Never Done Learning

$
0
0

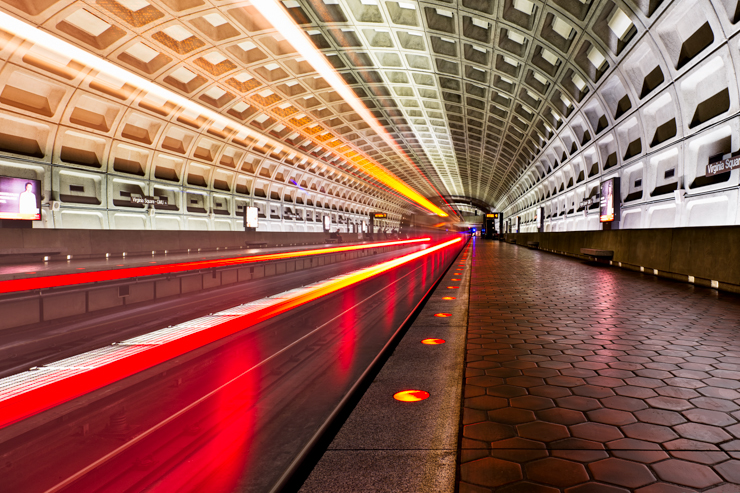
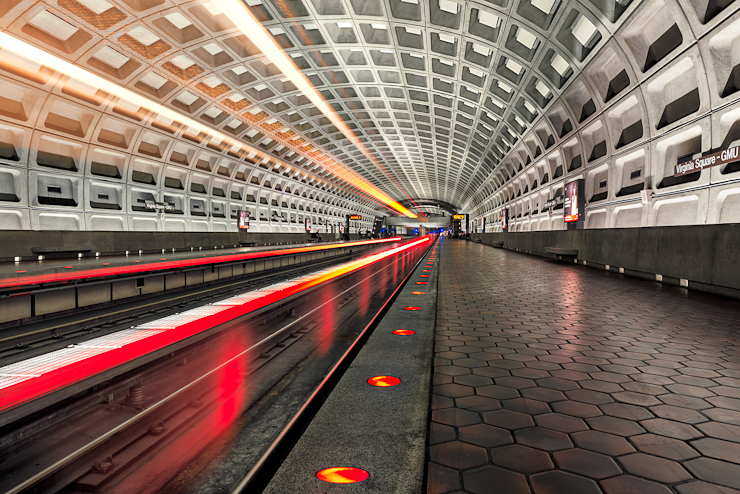
Just recently I decided to gauge the extent of my improvement in Photoshop and post processing in general with a simple challenge. I took one of my favourite photos from the past and re-processed it using my current abilities, from the raw files to completion, and see what the result would be. Luckily I haven’t looked at the finished product of the photo I shot and edited nearly two years ago for quite some time, so I had no pre-conceived notions of how I wanted it to look. The differences in the edit were quite profound as my early efforts in HDR photography always began with multi-exposure blending using HDR software like Nik HDR Efex or Photomatix, while my current workflow consists almost exclusively of manual blending. With manual blending I was able to control exactly what parts of my three exposures got blended and give me a much more refined and cleaner base to perform my edits from. The three exposures in question can be seen below:

My original edit – which I believed to be a spectacular shot at the time and actually won quite a bit of fanfare – mostly involved blending the exposures in Photomatix, applying some sharpening, some contrast correction in Nik Color Efex, some saturation adjustment on the light trails and adjusting the geometry. The results of my initial efforts can be seen here:

In the new image my workflow was much more targeted and subtle. I prepared each exposure carefully in Lightroom to make sure that the elements I wanted to preserve from each one were perfect at the raw level. I then moved them into Photoshop, stacked them on top of one another and spent about an hour blending the exposures using luminance masks and painted masks. My goal here was to create a uniform dynamic range and retain some of the detail on the left side of the frame. These details were lost in the original image since they were covered by the actual light trails shot which resulted in a bit of a haze created by the train itself obscuring for part of the tracks. By using luminance masks to isolate the light trails themselves I was able to extract just the light trail from the third exposure and create much better contrast between them and the darkness of the tracks. I then further evened out the exposure across the frame with several selective curves adjustments, and once that was done I focused on geometry and cleaning up the overall scene. In the past I spent quite a bit of time straightening out the level of the image and then distorting it to make the line in the bottom right as horizontal as possible as well. This time, rather than trying to make the line level and introducing a ton of distortion (and resulting in a cropped image), I simply removed the line altogether. I also got rid of one of the billboards on the left which took too much attention away from the light trails. For this I simply selected an area adjacent to the billboard, copied it, scaled it, placed it over top of the billboard and blended it in with a layer mask. Next I got rid of the terrible green/yellow color casts that you get when shooting the DC metro. I did this through a mix of the “selective color” filter and by isolating the green and yellow tones using two separate color range selections and adjusting the hue and saturation independently on both. Once this was cleaned up I moved on to adding contrast with Nik Color Efex’s “Pro Contrast” filter and performed sharpening with high pass filters and some subtle dodging and burning. I then took it back to Lightroom 5 and finished it off by adding a bit of Clarity and further desaturating greens using Lightroom’s HSL sliders. The final result looks something like this:

While some may still prefer the original image due to its more colourful nature, I feel the new one is an improvement in many ways. It has much less noise, has a lot more detail and dynamic range, has a more pleasing overall tone, is sharper, has less distracting elements and most importantly, matches my current style of processing and aligns with what I feel is important in a final image.

The lesson here isn’t necessarily the steps that I took to edit the new image but rather the fact that we shouldn’t ever think we’re done learning. When I edited the original image I thought I knew everything about post processing and produced an absolutely killer image. Today as I review the two side by side I begin to wonder what the heck I was thinking back then. I’m also certain that if I perform this exercise two years from now I’ll think the same thing yet again. The problem that we face as we progress in editing is two fold: we don’t know how to do something, and we simply don’t know what to do. After two years I find my self better able to visualize the final product that I want to achieve and have a strong idea of what qualities I want out of my final image. The ‘how’ is merely a matter of learning and exercise, the ‘what’ is much less tangible. It’s a combination of reviewing the images of those that are better than you and finding those qualities to strive for while also working towards developing your own style. As technologies change and the way you view your images does too, the results invariably will as well. This is a process that never ends, and that is the beauty of photography.

The post We’re Never Done Learning appeared first on Vibrant Shot Photography.

Removing Complex Objects from Photos in Photoshop

$
0
0

In this video tutorial we will take an in depth look at a number of post processing and in-camera techniques that you can use to remove challenging, unwanted objects or obstructions from your images. The below image is an example of where we’re starting and where we end up.

In order to provide you with the opportunity to try the techniques out yourself, I have provided the two images used in this tutorial in a relatively high resolution here:
Main image
Offset image

Some parts of this tutorial require the content-aware fill tools found in Photoshop CS5 and onward but most of the techniques can be done using CS3. Some of the things we will look at include:

  • Offset image blending for object removal
  • Frequency separation for shadow removal
  • Fragment duplication and blending
  • Color and exposure matching
  • Tips for content-aware fill

Thanks for watching and don’t forget to subscribe to my YouTube channel for more updates!

The post Removing Complex Objects from Photos in Photoshop appeared first on Vibrant Shot Photography.

Long Exposure Panorama Techniques – Part 1

$
0
0

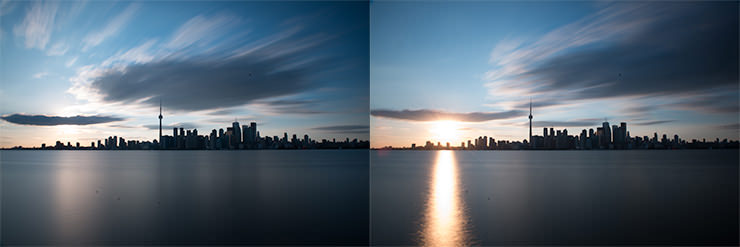
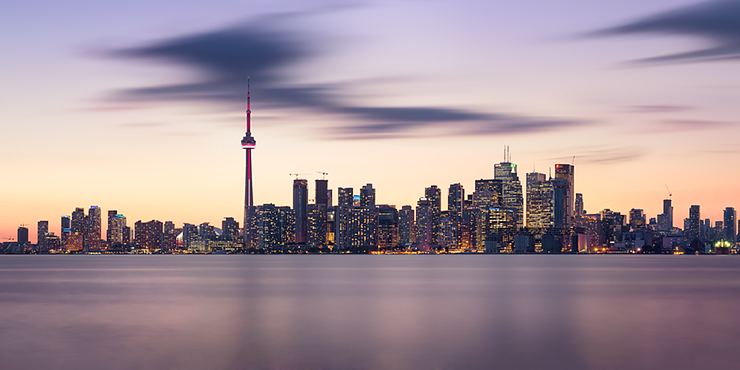
Taken from centre island in Toronto

Lately I’ve been shooting a lot of panoramas – particularly in a 2:1 ratio – for several reasons:

  • They look great printed and offer a resolution that can print at a massive scale
  • They look great online
  • They offer something a little bit different from the norm

Those of you that have been following me and my blog for some time, no doubt know how much I also like to shoot long exposures. Given these two preferences, it was only natural to combined them to create long exposure (LE) panoramas. While these LE pano’s look great, they pose a number of challenges that are less problematic when dealing with single image captures. For more details on shooting long exposures please visit this post.

Missing the moment

The most difficult part is simply the amount of time involved in creating them, with the time required to complete one long exposure now being multiplied by the number of frames you’re shooting. For example, I’ll often shoot in the 5-7 minute range for one frame, which translates to as much as 21 minutes on a mere three image panorama. The obvious problem is that while you’re try to achieve a great pano, you end up getting nothing. Those that are accustomed to long exposures will know that nailing the right exposure is often a guessing game since you’re not working with your in camera meter and simple multiplication of f-stop’s doesn’t necessarily yield a correct result. Given this guessing game, long exposures are a gamble on a single frame, but border on crazy with multiple frames. You could spend enough time fiddling with your settings and chasing the light that before you know it, the scene is gone and you missed the moment altogether.

Matching light and position

The other challenge is the simple fact that the sky itself is moving and the light is changing. If each exposure is a couple of minutes and the sky is moving across  the image (as opposed to towards the camera) then the same patch of clouds will show up in different areas of the panorama images and the blended sky won’t stitch together easily. Finally, five minutes is more than enough time for the light to completely change during sunrise or sunset, so the exposure times needed will vary from frame to frame and your light temperature (white balance) will do so as well.

Experimenting – The Toronto skyline

During an outing last week, I faced all of the above challenges and decided to experiment with a few solutions. The image at the start of this post is a sample of one of the shots that I captured that day.

Given the rapid left to right cloud movement and changing light, I knew that if I simply took the standard approach of shooting three or four images, I would end up with a patchwork images, all with different contrast levels, exposures and choppy skies. I therefore decided to experiment with a partial panorama approach that would work around a lot of these issues. In the case of the above frame, we really only have two areas that are affected by the long exposure, the sky and the water. Both elements are nicely isolated from the static elements and I didn’t require a particularly wide field of view. As a result, what I ended up doing was first shooting the entire scene at 24mm, then shooting a standard set of bracketed exposures going across frame for the buildings using a 50mm prime. I ended up shooting two long exposures in the same position (6 minutes each) to create a combined long exposure effect of twelve minutes (see below original samples). The buildings were shot using three vertical images going horizontally, each bracketed at three stops without any long exposure applied.

In post processing, I blended the two long exposures to establish a base image, which I then blew up around 40% to 10,000px in width using Photoshop CC’s intelligent up-sampling and cropped it down to a 2:1 ratio. Given that the only fragments that would be used from these images were the sky and water, which were already blurred, up-sampling had no detrimental effect on the image quality. Once this was done, I manually aligned and stitched together the three exposures of the buildings which resulted in a nice detail rich image, right where it counts. The final image actually contains many more exposures for various details so please see the section below for the full edit details. The basic idea with this approach is to shoot the motion component in one frame but capture the details with many. While this worked perfectly for me here, it does have a few limitations:

  1. Your field of view may exceed the widest focal length of your lens (this is often why you shoot pano’s after all). In this case it’s still easier to shoot 2 (maybe 3) sky images rather than 6 or 8. In this case you blend the two skies together, then blend the static images in after.
  2. Your delineation between static and moving objects may not be clear. If you had moving trees in the frame that encroached into the sky or water, this technique will result in a nightmare when trying to blend the static and moving elements.
  3. It’s not for the faint of heart. The edit can take anywhere from three to ten hours to complete depending on the number of exposures so you better have one beautiful scene to justify the time involved.
  4. The manual stitching can be difficult if there are elements that are close to the camera (thus heavily distorted from frame to frame) so it’s best to only use this when all elements of the scene are distant from the camera.

While this isn’t a one size fits all solution to shooting long exposure panoramas, my goal was to encourage a new way of thinking when shooting such images and really harness the possibilities that we have in post processing and use some more novel approaches to get to our final result. In the next post we will look at a photo I shot during blue hour using the standard panoramic approach and explore some techniques to help you overcome limitations there.

Image details

In addition to the above techniques, here are some details on this photo:
Camera: Nikon D800
Lenses: Nikon 24-70mm f2.8, Nikon 50mm f1.4
Filters: B+W ND110, Nikon Polarizer (12 stops of light blocking in total)
Long exposure: ISO50, f/22, 300sec, 24mm
Base exposure for buildings (two more images at -1ev and +1ev): ISO100, f/7, 1/2 sec, 50mm
Starburst exposure: ISO400, f/22, 30sec, 24mm (with B+W ND110) 

In total, 12 images were used including photos for the starburst on the sun, multiple highlight images for the buildings, 1 for water highlights and of course the ones mentioned above. The exposures were taken over a 40 minute period from 35 minutes before sunset to 5 minutes after sunset. Apart from a massive amount of blending, the remainder of the edit was just my standard workflow of sharpening with high pass layers, contrast adjustment with Nik Color Efex, dodging and burning and selective exposure adjustment with curves adjustment layers.

The post Long Exposure Panorama Techniques – Part 1 appeared first on Vibrant Shot Photography.

Mastering Image Sharpening in Photoshop

$
0
0

This video tutorial is all about sharpening. Here I’ll be taking an in-depth look at what sharpening is and how it works, the various tools that every retoucher should know, as well as some tips on how best to use them and when.

The specific sharpening tools that we will cover include:

  • Unsharp-Mask
  • Smart Sharpening
  • Camera Shake Removal in Photoshop CC
  • Multiple high pass filter sharpening methods
  • Frequency separation based sharpening

Most of the tools are available in Photoshop CS3 and onward with the exception of the Camera Shake Removal tool which is in Photoshop CC only. Do note however that sharpening tool like Unsharp Mask and Smart Sharpen have improved gradually in their output quality from version to version.

Here is a written reference on some of the values that I use and go over the video:

Unsharp Mask

Used primarily for output sharpening when preparing images for the web or print. At a max image width or height of 2048:
Amount: 200-400%  Radius: 0.1 – 0.2  Threshold: 5-20

As mentioned in the video, I generally don’t recommend sharpening with Unsharp Mask during your editing workflow, but on a 36MP image my settings would be:
Amount: 40-100%  Radius: 0.4 – 1  Threshold: 5-20

A general rule of thumb in both cases is to decrease radius while increasing amount and vice versa. Once I’m done, I’ll usually back off my sharpened layer opacity to 70%. Be sure to check out the bonus tip at the end of the video for a useful trick with Unsharp Mask!

Smart Sharpening

With the release of the improved Smart Sharpen filter in Photoshop CC, it has become my tool of choice for output sharpening. At a max image width or height of 2048:
Amount: 200-400%  Radius: 0.2 – 0.3  Remove: Gaussian Blur
Amount: 100-200%  Radius: 0.1  Remove: Lens Blur

As with Unsharp Mask, I don’t often use Smart Sharpen during my editing workflow, but on a 36MP image my settings are:
Amount: 40-100%  Radius: 0.5 – 1  Remove: Gaussian Blur or Lens Blur

Again, once applied, I’ll usually back off my sharpened layer opacity to 70%.

High Pass and Frequency Separation Sharpening

Both high pass sharpening and frequency separation sharpening work in a similar fashion, but as explained in the video, frequency separation sharpening produces better results. In the high pass approach the radius is set in the actual high pass filter, while in the frequency separation approach it is set in the Gaussian blur tool, but in general the values are the same for both. In a 36MP image I typically use the following:
Radius: 0.5 – 1.5  Layer Blend Mode: Vivid Light or Hard Light
Radius: 8 – 15  Layer Blend Mode: Soft Light or Overlay
Radius: 100  Layer Blend Mode: Soft Light

In all cases, lower your sharpening layer’s opacity to 30%-50%. To translate to your camera’s mega-pixel value, just take a fraction of the value that corresponds to your mega-pixel count vs. mine. For example, a 12MP camera is 1/3 of 36mp so just divide the above radius values by 3. If you had 18MP, divide by 2, etc.

Thanks for watching and don’t forget to subscribe to my YouTube channel for more updates!

The post Mastering Image Sharpening in Photoshop appeared first on Vibrant Shot Photography.

Photographing a Portofino Sunrise

$
0
0

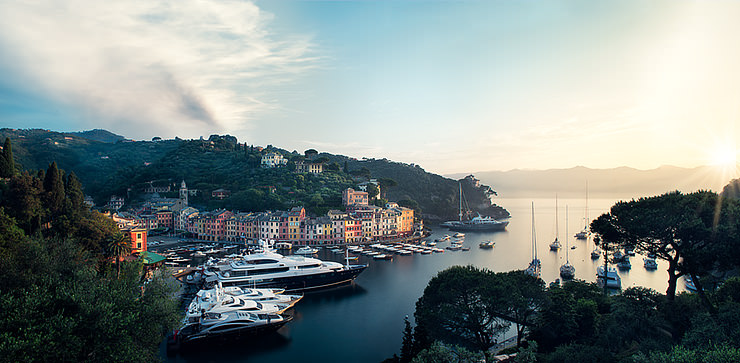
Portofino, Italy, Sunrise PanoramaOften times, the joy of photography isn’t merely in seeing the finished product and wallowing in the praise of its viewers, it’s about the experience of actually taking it. This image from Portofino was exactly that, an amazing experience that I won’t soon forget.

Posh as they come, Portofino has been the destination of choice French playboys and the British elite looking to bask in the sun of the Ligurian coast. Beyond its array of luxury shops and overpriced eateries, Portofino is easily one of the most beautiful places I’ve been to. Despite its popularity with the European jet setters, it’s not nearly as popular with photographers as other towns in Liguria, such as those of Cinque Terre. Thanks to this I new that I could get a photo that is a bit less familiar to the viewing public and still capture the essence of what makes Cinque Terre so special.

Having scoped out vantage points a few days prior to taking the photo I settled on a lookout point near the church of San Giorgio which gave a relatively unobscured and high vantage point. While the better situated Castello Brown would have been the ideal spot thanks to its higher vantage point, it wasn’t open during sunrise or sunset hours, thus eliminating it as an option.

Getting There

Since staying in Portofino is both neither cost effective nor convenient for visiting nearby towns, I ended up staying in the town of Santa Margherita Ligure  which was a few miles away. Having determined my location the next challenge was finding a way to get to this spot at 5:00am to have ample time to set up and catch the early morning light. Getting there during the day was relatively simple as ample boat and bus service exists, but sadly the sunset light wasn’t terribly picturesque given the easternly position of the town. After deciding against a 60EUR cab right, I found a bicycle sharing service in Santa Margherita for a pittance at only 12Eur for two days. At 4:30am I set off on my not so sporty bicycle and spent the next half hour cycling, excited by the anticipation of a nice sunrise. Without a person in sight, I peddled along the coastal road to Portofino built by the Romans hundreds of years ago and watched the blue hour hues begin to glow in the sky. After stopping for a few shots I finally arrived at my destination, invigorated by the fresh Mediterranean air, ready to shoot.

The Shooting Techniques

After setting up, I quickly realized that a single image wouldn’t convey the real magic of this place. The positioning of the sun was way off to the East side of the town and neither the town or the area of sunrise proved interesting enough on its own. I therefore decided to go with a panorama and ended up shooting four horizontal images. Each slice consisted of a long exposure image using a 10 stop ND filter to smooth the water and three bracketed frames without the ND filter for extra dynamic range and to freeze moving objects. Once I made my way to the area of the rising sun, I closed down my aperture to f/22 to capture a starburst. In total I ended up using a total of thirteen frames to create the final image.

The Post Processing

First off, please note that the links in this section will take you to tutorial videos I’ve made on the corresponding topics. Post work was largely spent manually stitching together the frames to get to the final panorama you see here. For each frame, I first blended in the -1ev and +1ev with the long exposure using luminance masks and also using painted masks to fix any motion blur in the boats (this is a nightmare to do by the way). Once I finished each slice, I exported out the flattened layer to my master image where I built up the stitching. After blending in the four slices and taking care of any distortion issues, I then blended in the starburst capture of the sun and began my usual workflow. I first ran it through a quick pass of Nik Color Efex using the Pro Contrast filter to boost contrast, then adjusted the colours to emphasize the facades of the houses and tones of the sky and sun and finally proceeded to dodge and burn the various areas (particularly in the trees) to achieve a nice sense of depth. With that out of the way, I finished the image off with a variety of frequency separation based sharpening methods and did some final contrast and exposure adjustments with levels.

Settings/Gear

Nikon D800, Nikon 24-70mm f2.8 with B+W ND110, Benro Carbon Travel Angel Tripod, Nikon MC-36 trigger release.
Long exposure: ISO100, 70sec, f/11, 24mm
Base exposure: ISO11, 1/20th, f/11, 24mm

Although I may not have gotten the cloudy sky that I hoped for that day, the wash of golden light running across the frame turned out to be a blessing and really helped to embody the spirit of this incredible location. While some people may see it as a nightmare to pedal several miles on a heavy bicycle with 20lb of gear on their back at 4:30am, for me it was one of the most enjoyable photographic excursions that I’ve had and a memory that will continue to resurface every time I look at this shot. I guess it’s time to get it printed and hang in on the wall.

The post Photographing a Portofino Sunrise appeared first on Vibrant Shot Photography.

Using Lab Mode to Change Colour and Contrast in Photoshop

$
0
0

In this video tutorial I’ll show you how you can use Lab color mode in Photoshop to quickly, easily and drastically change the color and contrast in your images and really make them pop.

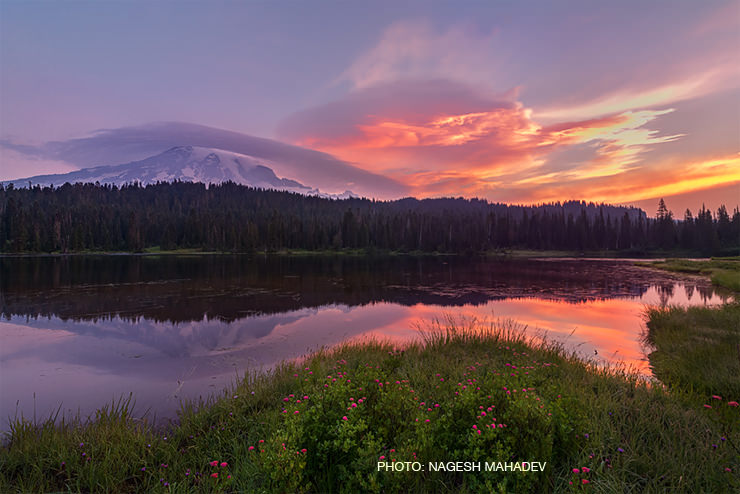
First off a big thanks to my friend Nagesh Mahadev for letting me demo these techniques one one of his amazing images. Be sure to check out his work on his 500px page and his Facebook page. The ‘before’ image can be seen below, and while it’s a great image to begin with, I wanted to add more contrast to the mountain and add further separation to the huge array of colours that exist here. Lab mode proved to be a perfect way to do this.

Photoshop LAB Mode - Before Adjustment

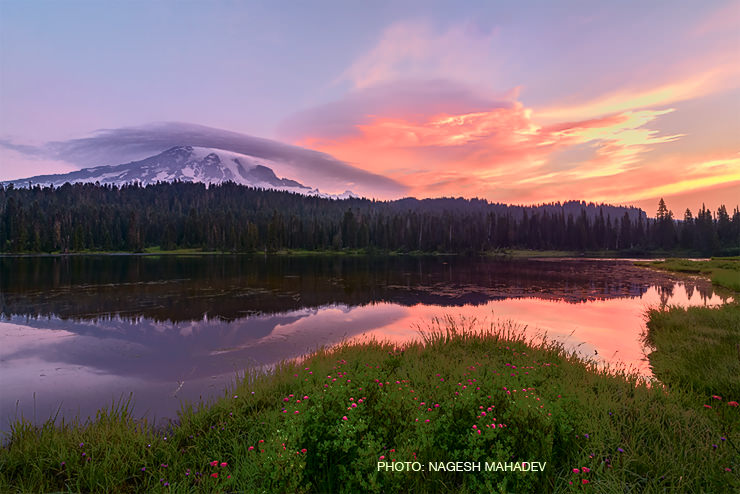
The ‘after’ image with just a few minutes of curves adjustments in Lab mode can be seen below. The video goes into detail about the specific adjustments that were done and how you can integrate Lab colour mode into your existing RGB workflow.

Photoshop LAB Mode - After Adjustment

Lab color mode has been available since Photoshop 3.0 so all the techniques covered here will work with just about any version of Photoshop that you have.

Thanks for watching and don’t forget to subscribe to my YouTube channel for more updates!

The post Using Lab Mode to Change Colour and Contrast in Photoshop appeared first on Vibrant Shot Photography.

Long Exposure Panorama Techniques – Part 2

$
0
0

As an extension of our previous long exposure panorama techniques article where we took a more unique approach to overcoming some of the challenges that exist, here we’ll talk about the more traditional method and how to mitigate some of the problems you’ll face.

As mentioned in part 1, long exposure panoramas pose a unique set of challenges, particularly when shooting at sunrise or sunset. We have to deal with not only changing light conditions but also a moving sky that makes stitching quite a challenge. In part 1 we overcame some of these problems by taking a single long exposure of the moving features such as the sky and water, and then taking panoramic shots of the details like the buildings and blending it all together. Here I opted for a standard three long-exposure image approach for all the elements, then three more short exposures for the buildings lights once they came on. There is no particular reason why I shot this image in this manner and the previous one as described, I simply wanted to experiment with both options and see what works best. Here’s what I discovered over the course of this experiment.

Find your Starting Point

Given that the bulk of the visual interest was in the middle, I opted to shoot it first, then shot the left, then right frames. The majority of the cloud was there and I wanted to capture it when the light was best. While this sounded good in theory, in practice it caused a problem with cloud position once I began to blend the exposures. Because the clouds were moving left to right, by the time I shot the left frame, the left edge of the main cloud had largely escaped into the middle frame, leaving me with a sharp line on the middle frame that I couldn’t easily complete. I had to resort to a fair bit of clone, transform and mask trickery to re-create the cloud edge which is ultimately wasted time. My advice here is to always photograph in the direction of the cloud movement. Note that if the clouds are moving towards or away from you this problem doesn’t exist and the blend is actually quite simple regardless of what order you shoot in.

Opt for a Conservative Shutter Speed

Starting with the middle, I went for a very long exposure of nearly 7 minutes to get a good deal of blur in the sky which turned out to be a mistake. While the 7 minute exposure looked great in the end, it ate up a good deal of time and I had to deal with a drastically different light temperature once I moved to my left and right frames. Having noticed this change I reduced my exposure time to around 3.5 minutes and compensated with a larger aperture for the remaining frames. In hindsight, around 2 minutes for all three images would have been a sufficient exposure time. It would allow enough time to smooth out the water, and given the clean separation of land and sky, I could have applied additional blur to the sky via a motion blur or radial blur filter in Photoshop to compensate. This would have reduced the issues with light temperature and exposure variance and made the final colour matching a lot easier. In a nutshell, don’t overdo the exposure time and try to capture all your frames in no more than a 10 minute time period (ideally less) whenever you’re shooting at sunrise or sunset.

Get Comfortable with Manual Blending

With moving skies, blending using automated tools tends to produce relatively poor results which is why I generally blend these panoramas manually using layer masks. Once you get the images relatively well aligned the next step is to use the free transform tool, to correct any perspective issues that may exist from frame to frame, the extent of which will vary depending on whether a nodal point slide was used or not. In this case I didn’t use a nodal slide as the subject was at a far distance from the camera so perspective corrections remained minimal but if you have one, use it. With the alignment out of the way you can take care of color and exposure variances using curves adjustments and then it’s just a matter of finding suitable blend points and using masks to hide the unnecessary parts of each slice. The best blend points are simply areas that transition well into one another, or contain very little detail which makes it easier to feather the transition together using a soft mask. I’m sure I’ll be demonstrating this process in a future tutorial so follow us on Facebook or subscribe to our YouTube channel to get notifications on that.

Have Patience

No matter how you slice it, blending these exposures together into a seamless image is still a daunting task so plenty of patience is needed. In the case of the above image, the real challenge came about when I had to blend in the three short exposures for the building lights which were completely mis-aligned and had to be manually overlaid using free transform tools. The whole edit took over 10 hours so it’s not a project for those looking to minimize their post processing time.

In a Perfect World

If cost was no issue and we had an unlimited supply of gear, a few things would help to simplify the process. The first is a nodal slide with a panorama plate such as this one from Really Right Stuff. With this piece of gear you can make note of the specific angle (degree) used for each exposure and quickly return to those position when shooting the building light exposures. This will save you a tremendous amount of time aligning the images together, and after my experience with it, you can bet that this is the next item on my wishlist. Another thing this is useful for is that you can pre-plan the amount of rotation degrees needed for each frame prior to installing the 10 stop ND filter, thus eliminating visibility issues once the 10 stop is on, as well as reducing the amount of time needed between frames. The next useful tool is either a second camera or a light meter. This will allow you to measure the amount of reflected light between each of your long exposures, and adjust the shutter speed or aperture on the fly to compensate for it. In my case I didn’t have either so I guessed at a half a stop difference for my last frame, when in reality about a full stop was needed. You could take the 10 stop filter off and measure using the in-camera meter but taking the filter on and off and juggling camera settings like this can often lead to more errors and problems than it actually solves and wastes precious time. If you don’t have another camera or a light meter, go for a change of +1/2 stop every 4 minutes just after sunset, or -1/2 for every 4 minutes before sunrise.

Get There Early

Post processing prowess and fancy kit is never a substitute for careful planning. Getting to your location early and giving yourself lots of time to plan is essential. Once the optimal light starts to shine you have to have your game plan ready so you don’t waste any time fiddling around. Your preparation process should go like this:

  1. Determine your focal length, composition, and mark your rotation (degree) points in advance so that you can quickly re-create them once your ND filter is on. To do this well you really do need the pano kit I discussed above, or at minimum a ball head with a degree of rotation indicator on it.
  2. About 40 minutes prior, start testing the cloud movement and overall long exposure conditions to find a suitable shutter speed. As mentioned, keep it as low as possible but long enough to create a dramatic enough effect. Consider whether the effect can be exaggerated in post processing to save precious capture time.
  3. As soon as the sun hides behind the horizon, put on the ND filter and take a shot at ISO 400, f/5.6 for 30 seconds. Review it on the screen and the histogram to check if your exposure is good. If it’s way off, adjust one or two stops up or down and take another test. Once it looks good, drop your ISO back to 100 (that’s 2 stops), then increase or decrease the aperture by the number of stops needed to achieve the ideal shutter speed you calculated earlier. For example, if we need to get to 2 minutes, we would simply drop to ISO 100 (down 2 two stops), then up two stops from 30 seconds to 2 minutes. If we needed 4 minutes we could increase to f/7, ISO 100 or stay at f/5.6 and go down to ISO 50 (if you have it). As you can see, quickly calculating f-stops in your head is another essential skill here.

Image details

In addition to the above techniques, here are some details on this photo:
Camera: Nikon D800
Lenses: Nikon 24-70mm f2.8, Nikon 50mm f1.4
Filters: B+W ND110
Long exposure middle: ISO100, f/11, 400 seconds, 58mm
Long exposure left: ISO100, f/7, 200 seconds, 58mm
Long exposure right: ISO100, f/6.3, 200 seconds, 58mm
Exposure for building lights: ISO200, f/7, 1.5 sec, 58mm

In total, 6 images were used and the exposures were taken over a 40 minute period, with 13 minutes to get the long exposures and then a 25 minute break before the lights came on. Apart from the manual panorama stitching and exposure blending, the remainder of the edit was quite simple. I made a number of tonal adjustments to the water and sky, applied some curves adjustments using radial and linear gradient masks to the sky and water, dodged and burned some of the buildings, and sharpened using a few high pass filter layers. Final output sharpening was done with the Smart Sharpen filter in Photoshop CC.

As you can see, long exposure panoramas offer a lot of room for experimentation and can produce really nice results, but they do require you to be prepared and familiar with the technical details of shooting standard panoramas and standard long exposures. It’s essentially long exposure images and panorama images taken to the extreme.

The post Long Exposure Panorama Techniques – Part 2 appeared first on Vibrant Shot Photography.


Dark Skin Beauty Photography

$
0
0

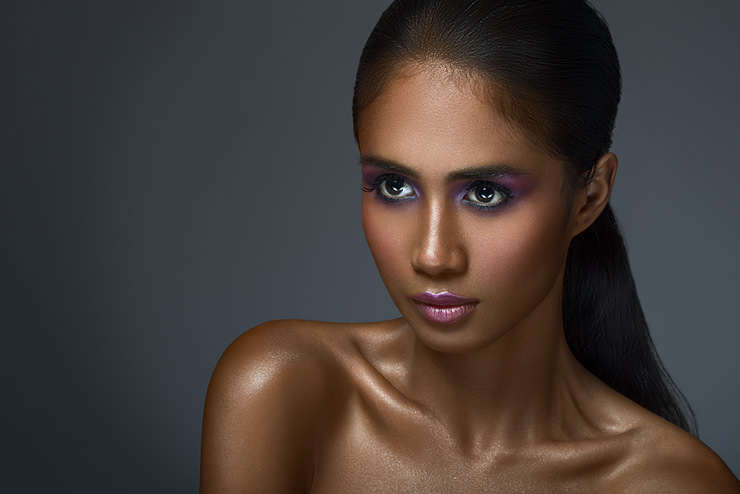
As a complement to my previous posts on beauty photography (part 1, part 2), I thought I’d further elaborate by going over a real life example from a shoot I did last week. This one is also made a little bit more interesting by virtue of the fact that I got to work with a dark skin model, which has subtle impacts on both the lighting and retouching processes.

Dark Skin Beauty Shot, Toronto

The above image is one of the shots taken during the shoot (higher resolution version can be found in my portfolio) and will serve as the basis for the remainder of this post.

Lighting and Camera Settings

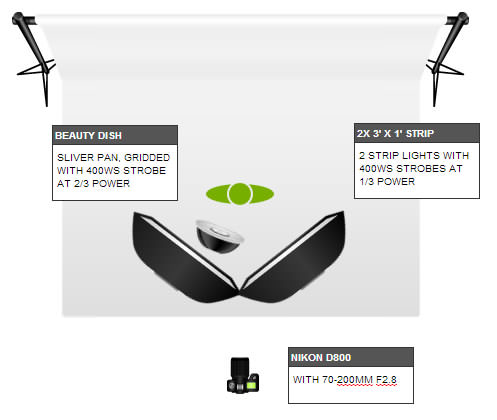
Lighting was a variation of the commonly used clamshell approach. While clamshell lighting typically involves a light source from above and one from below (or a reflector below), or alternatively from side to side, here I used two Elinchrom strip lights in a V-shape from the bottom as opposed to just a single source (as seen in the lighting diagram below). The main light was a white, 17″ Elinchrom beauty dish with a 30 degree on it to focus the light and add extra contrast. Using a fairly hard light source like this has its advantages and drawbacks. On the plus side it helps to accentuate skin texture, creates nice spectral highlights (especially in dark skin models) and produces a good deal of contrast. The downside is that it will also bring out any imperfections and requires a lot of fine tuning, as even small changes in direction can drastically alter the resulting light on your subject. It’s certainly not a light source you would want to use for a portrait of a middle aged business woman for her LinkedIn profile, but for beauty shots and sports portraiture it can deliver a nice result. The choice of two strip lights from below was driven by the desire for a more wrapping fill light, as well as to produce a more interesting catchlight. All three strobes were 400ws Elinchrom heads with the main set at 2/3 power and each of the fill lights set to 1/3.

Beauty shot lighting diagram

Camera settings and gear were pretty standard for what you would typically use in beauty photography. A Nikon 70-200mm f2.8 VRII lens @120mm was used to give a nice facial compression while the D800 gives me a nice detail rich file to work off of. Exposure settings were ISO100, 1/250th, f/10 which provided about a half a stop of under-exposure given the lighting settings. I under exposed in order to preserve highlights and ensure that there were no areas of the skin that were blown out. Dark skin models tend to have a fairly reflective skin surface so over lighting can quickly produce unrecoverable areas. Finally to ensure maximum sharpness and detail (and to save my arm from falling off), the camera was mounted on a tripod and set to the models head height.

Post Processing

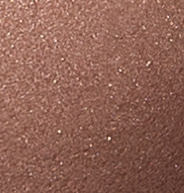
I remember when I first started out and looked at flawless retouched beauty images, I was convinced that there was some magic trick that professional retouchers used but didn’t tell us that achieved their signature, clean and refined commercial look. Beauty Retouch Skin TextureOver time I came to realize that the only trick being used is patience, and lots of it. The crucial element to a good beauty retouch is preserving skin texture, and furthermore enhancing it. The sample you see on the left is a 100% crop of a tiny fragment of the models cheek and is intended to show you the degree of texture that should be present in the final image. As you can imagine, this at no point involves softening the skin using blurring techniques or quick fix plug-ins like Portrait Professional. While those approaches may work OK for certain types of photography, there is no room for them in beauty photography. There were no mysterious techniques involved in achieving this level of texture, in fact all of the tools that I used to retouch this image have been demonstrated at one point or another on my YouTube channel with some specific links provided below. In the case of this image, my workflow went something like this:

  1. Use the liquify tool to enhance body lines and fix bumps in the hair
  2. Clean up the skin using spot healing brush, then healing brush, then the clone stamp tool. Always use the clone stamp tool at close to 100% opacity to prevent blurring. Do this until all small blemishes are removed and don’t worry about larger discolourations (this will be fixed later).
  3. Clean up stray hairs and fly-aways with clone stamp tool and spot healing brush, patience is a virtue here.
  4. Cut out the entire subject with the pen tool, make a selection and then refine the selection using the ‘refine edge’ tool to select individual hairs. This is important so that we can operate on the subject and the background independently, so save the selection for later use.
  5. Even out skin tone, exposure and fix the make-up with frequency separation, see this tutorial for a demonstration.
  6. Brighten the eyes with a curves adjustment and make the lip line perfect by cutting out the lips using the pen tool and using the clone-stamp tool on the inside and outside of the lips.
  7. Enhance contrast and facial features with dodging and burning
  8. Tone the image through a variety of colour adjustment tools including a black and white layer with soft light blend mode, selective colour, and curves adjustments. Separate adjustments were made to the subject and the background thanks to the cut-out mask we made earlier.
  9. Sharpen the image using two frequency separation sharpening layers as demonstrated in the linked video.
  10. Output sharpen as shown in the above video

The entire retouch took around 6-7 hours which is fairly standard for a beauty shot. You may want to take a look at my Natural Outdoor Portrait Retouch tutorial (part 1 and part 2) as the workflow for both is similar, but taken to the extreme and much more detailed in the case of a beauty shot. One advantage of having a dark skin model in your retouch is that you can create a much higher degree of contrast and really make the spectral highlights pop without it looking over the top. Furthermore, you can experiment with some interesting colour overlays on the skin tone to achieve a nice golden colour. As I’ve said before, beauty retouching is nothing more than good portrait retouching techniques taken to a really fine grained level until perfection is achieved. There is no mystery to it, only patience and time.

The post Dark Skin Beauty Photography appeared first on Vibrant Shot Photography.

Editing and Compositing Night Photos in Photoshop – Part 1

$
0
0

In this first of a two part video tutorial, I’ll taking you through a full edit of a night time cityscape and cover a number of color adjustment, masking and compositing techniques along the way.

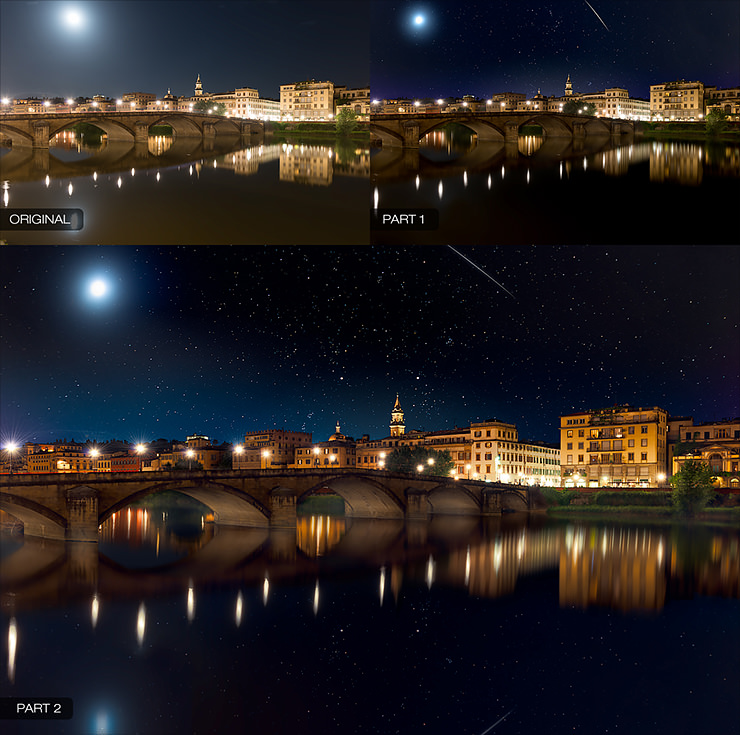
We’ll be working with a number of relatively basic tools to build up this image, most of which are available from Photoshop CS3 and onward. In this first part we’ll be extending the dynamic range, doing some basic colour adjustments and compositing in our sky, moon and shooting star. In part two we’ll be adding reflections, balancing out the foreground colour, dodging and burning, adding haze, and finishing off the image with some selective sharpening. The progression can be seen in the image above.

The gear and settings for this image were as follows:
Camera: Nikon D800
Lenses: Nikon 24-70mm f2.8, Nikon 14-24mm f2.8 (for sky)
Base Exposure: ISO200, f/7, 8 seconds, 28mm
Exposure for shadows: ISO200, f/7, 15 seconds, 28mm
Exposure for the sky: ISO400, f/2.8, 30 seconds, 14mm
Exposure for moon: ISO200, f/7, 1.3 seconds, 36mm

As you’ll see in the video, 4 images were used to composite the final photo. The Base exposure had the blacks slider reduced to -40 and contrast increased to +15 in Lightroom before being brought into Photoshop.

Part two of this tutorial can be found here.

Thanks for watching and don’t forget to subscribe to my YouTube channel for more updates!

The post Editing and Compositing Night Photos in Photoshop – Part 1 appeared first on Vibrant Shot Photography.

Editing and Compositing Night Photos in Photoshop – Part 2

$
0
0

In this second of our two part video tutorial, we’ll be finishing up our full edit of a night time cityscape composite. If you missed part 1 of this tutorial it can be found here.

We’ll be working with a number of relatively basic tools to build up this image, most of which are available from Photoshop CS3 and onward. In the first part we extended the dynamic range of the image, worked on some basic colour adjustments and composited in our sky, moon and shooting star. In this second part we’ll be adding reflections, making tonal adjustments, dodging and burning, sharpening and adding some mood and atmosphere.

The gear and settings for this image were as follows:
Camera: Nikon D800
Lenses: Nikon 24-70mm f2.8, Nikon 14-24mm f2.8 (for sky)
Base Exposure: ISO200, f/7, 8 seconds, 28mm
Exposure for shadows: ISO200, f/7, 15 seconds, 28mm
Exposure for the sky: ISO400, f/2.8, 30 seconds, 14mm
Exposure for moon: ISO200, f/7, 1.3 seconds, 36mm

As you’ll see in the video, 4 images were used to composite the final photo. The Base exposure had the blacks slider reduced to -40 and contrast increased to +15 in Lightroom before being brought into Photoshop.

Thanks for watching and don’t forget to subscribe to my YouTube channel for more updates!

The post Editing and Compositing Night Photos in Photoshop – Part 2 appeared first on Vibrant Shot Photography.

How to Edit the Milky Way in Photoshop

$
0
0

In this video tutorial I’ll be walking you through how to process Milky Way images in Photoshop as well as adding a light painted effect to the foreground.

First off a big thanks to my friend Nagesh Mahadev for letting me demo these techniques one one of his amazing images. Be sure to check out his work on his 500px page and his Facebook page.

The tools used in this video are available in Photoshop CS3 and onward with no other plug-ins needed. Some of the tools we’ll be using include:

  • Channel based selections
  • Contrast adjustment with curves
  • Colourizing with curves, selective colour and fill layers
  • Various blend modes
  • High pass based contrast adjustment
  • Dodging and burning

Thanks for watching and don’t forget to subscribe to my YouTube channel for more updates!

The post How to Edit the Milky Way in Photoshop appeared first on Vibrant Shot Photography.

How to Retouch Lips in Photoshop

$
0
0

In this video tutorial I’ll show you some tips and tricks for retouching lips in portraits or beauty shots. Note that this is a more advanced tutorial that assumes you have a good working knowledge of Photoshop tools already.

Lip retouching can be one of the most tedious and time consuming parts of the image so my goal here is to give you some advice on where to start and what tools work best. We’ll work on fixing cracked lips with an inverted high pass technique, add shine to the lips and also define the lip line.

The tools used in this video are available in Photoshop CS3 and onward with no other plug-ins needed. Some of the tools we’ll be using include:

  • Frequency separation
  • Healing brush and clone-stamp tool
  • Texture grafting and blending
  • Pen Tool
  • Blend-if

Thanks for watching and don’t forget to subscribe to my YouTube channel for more updates!

The post How to Retouch Lips in Photoshop appeared first on Vibrant Shot Photography.

Introducing the 500px Art Print Store

$
0
0

As you may know, I’m a big fan of 500px and have been for some time. Prior to today, their marketplace for selling and ordering prints was quite limited in that it only allowed for a single media type in one size. That’s all changed as of today with the release of the 500px Art store which now offers 4 sizes and 6 media types to choose from.

The good folks at 500px have asked me to create a few videos to help get you acquainted with the new site and how to get your store set up so you can begin selling prints. After playing around with it for a few weeks I have to say that I’m impressed with the new site and look forward to the opportunity that it provides to users of 500px.

As an example, you can see my store located here 

Introduction to the store

Setting up your store

Order prints from 500px Art

The post Introducing the 500px Art Print Store appeared first on Vibrant Shot Photography.

The Best of 2013

$
0
0

With the year drawing to a close it’s time once again to reflect on the year and pick some of my favourite photos that I shot in 2013. With a mix of landscape, architecture and portraiture, these are listed here in no particular order as I would be hard pressed to rank them given the variety of genres.

1. Breaking Through

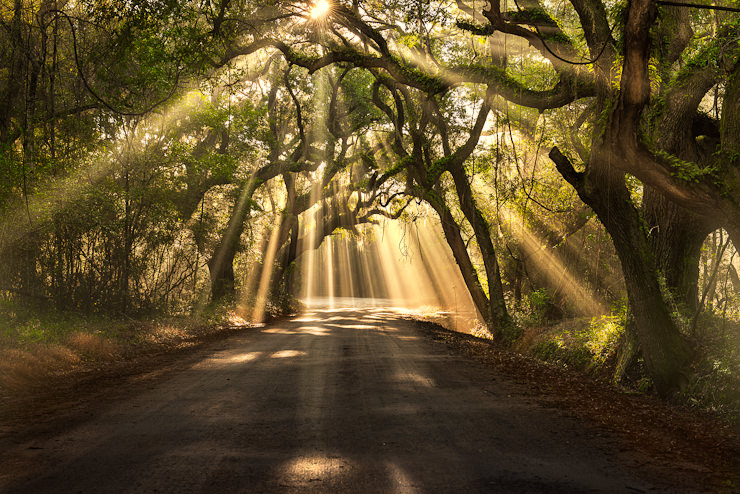
My 2013 list would be incomplete if I didn’t include my most well known image of the year. With millions of views on Facebook, Google Plus and 500px as well as a feature as the image of the day on the Bing homepage, it’s certainly my most popular and well recognized image. Shot right at the start of the 2013 year, the image was largely the result of perfect weather conditions and sun position, and a case of being at the right place at the right time. Taken on Edisto Island, South Carolina.

Botany Bay Light Rays, Edisto Island, South Carolina

2. Starry Night in Florence

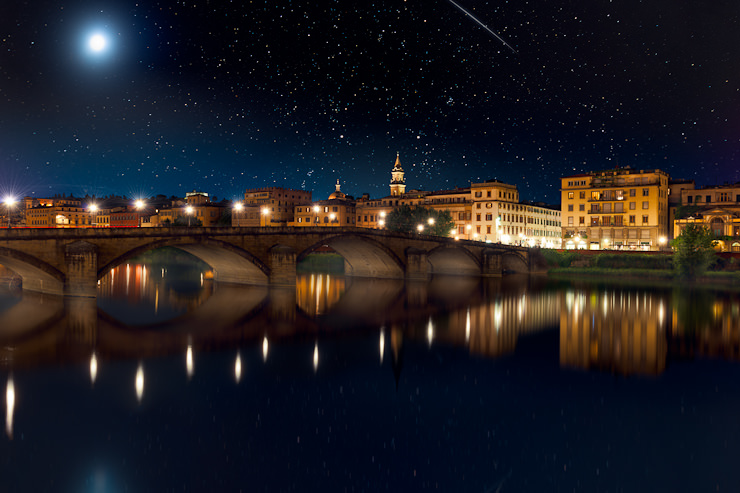
Although it’s a composite image it still remains one of my favourites from my visit to the beautiful city of Florence, Italy. I was fortunate enough to get an Editors Choice award for it on 500px and thousands of likes and shares across various social networks. For those of you that are interested in how it was created, you can visit my two part video tutorial where I walk you through it step-by-step.

Florence Italy at Night

Vatican Staircase, Rome, Italy3. Leaving the Vatican (left)

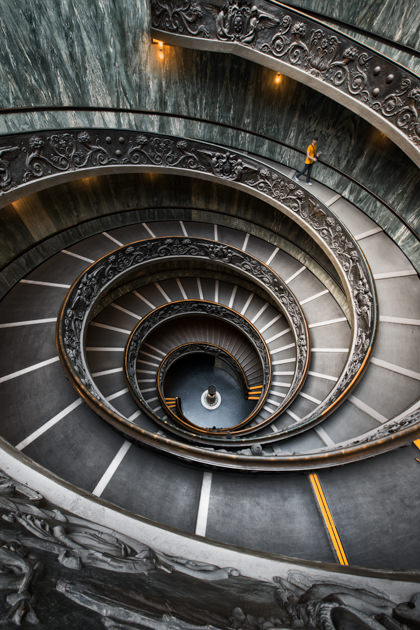
Another one of my favourites from my visit to Italy. This iconic Vatican staircase has been photographed countless times, so my goal here was to get it as perfect as I could and score on technical merit. I spent about 30 minutes shooting a variety of frames and compositions at this location to find the optimum location and also give myself enough images to be able to blend out any tourists that I didn’t want in the frame. Because tripod use wasn’t allowed, the image had to be shot at a high ISO and 5 exposures were taken (-2ev to +2ev) to capture the wide dynamic range of the scene. Just recently this image also received an Editors Choice award on 500px making its inclusion into this list all the more fitting.

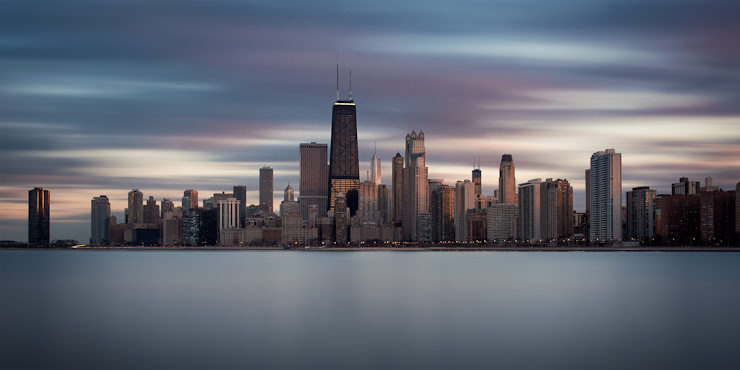
4. Good Evening Chicago (below)

Although the weather was less than ideal during my visit to Chicago in April of 2013, I was blessed with a few hours of fast moving and colourful clouds during a skyline shoot from Lincoln Park. I spent close to 2 hours at this location photographing 5-10 minute long exposures and nearly freezing as I was ill-prepared for the frigid temperatures that I encountered in the windy city. The final result made the whole ordeal worthwhile.

Chicago Skyline Long Exposure Panorama

5. 40 Minutes in Toronto

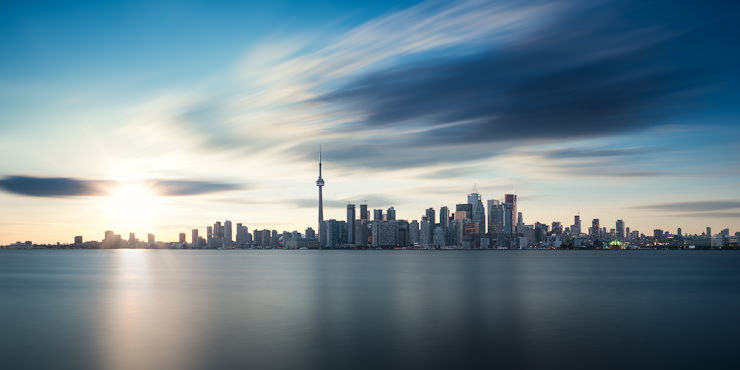
Part of an experimental set of photos I did for various long-exposure panoramic techniques that I documented here, this image of the Toronto skyline is without a doubt one of my favourites of the year. It presented a number of challenges including shooting into the sun and stitching together three 5+ minute exposures. All in all it’s a blend of photos shot over a 40 minute period leading up to sunset.

Toronto Skyline, Long Exposure Panorama

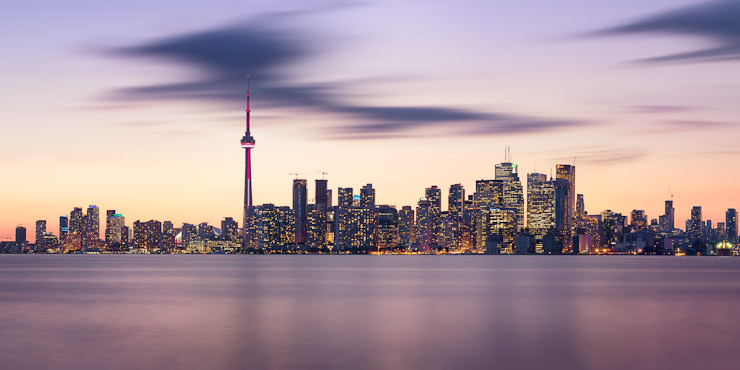
6. Ghosts over Toronto

Another one from the same series as the above but taken after sunset. The details of the photo and post processing can be found here.

Toronto Skyline, Long Exposure Panorama

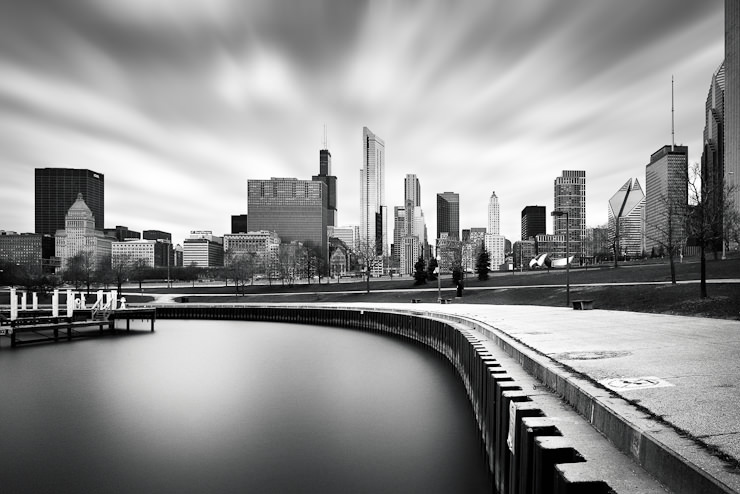
7. Chicago Shores

Another image from my visit to Chicago but this time shot in the morning just after sunrise. That particular morning was quite gloomy so to make the most of it I decided that a high contrast B&W long exposure would yield some nice results, and thankfully it did.

Chicago Skyline Long Exposure

8. Medici Skylight

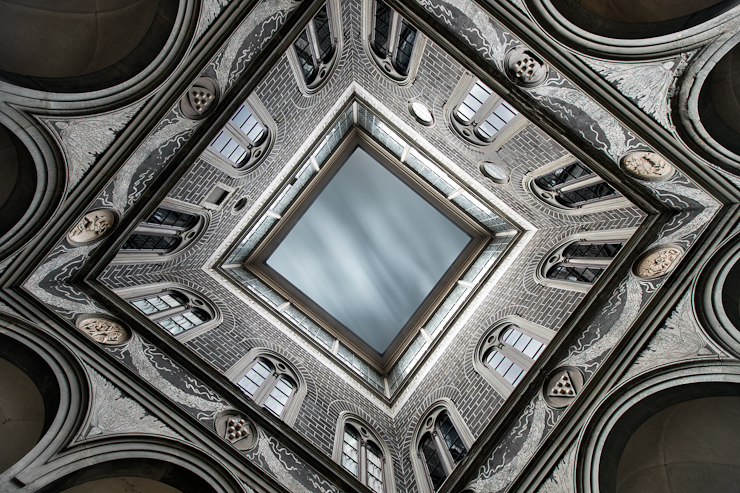
While I generally prefer to shoot more modern architecture, there were a few locations in Italy that are so incredible that they are hard to resist, and the Palazzo Medici Riccardi is one of them. The details of the building were absolutely awe inspiring and even after hundreds of years the design still feels fresh and forward thinking. Every time I look at this photo I’m reminded of laying flat on the ground, shooting upwards while people walked around me giving me awkward looks. It’s all part of the fun.

Palazzo Medici Riccardi, Florence

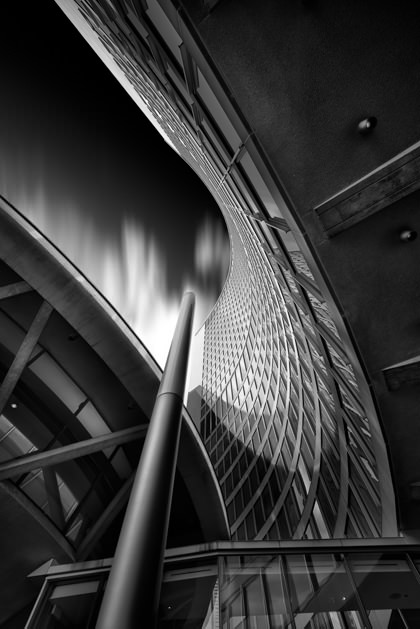
Architecture, City Hall Toronto9. The Tipping Point

Over the summer I decided to revisit one of my favourite architecture locations in Toronto, the new city hall building. I spent close to two hours there in search of a fresh composition and this was the result of my experiments. Although it’s almost 50 years old, the architecture is still inspiring and eye-catching every time I see it.

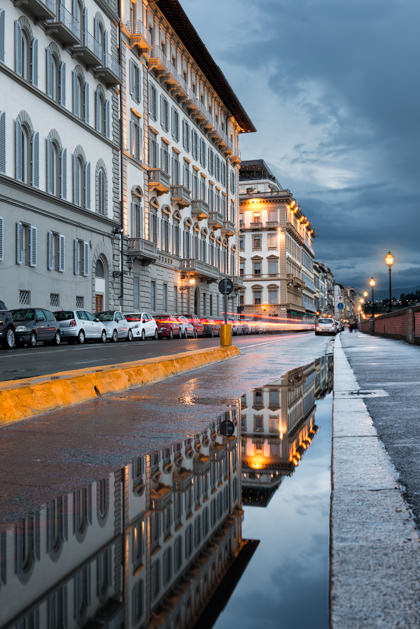
Reflections in Florence Italy10. Reflecting on Florence

After a rainy evening in Florence, I caught a break in the weather and decided to go out in search of reflections. Strangely enough, Florence seems to have exceptionally good drainage as this was one of the only puddles I could find. Luckily it was well placed and the light trails were just the cherry on top of the cake. Interestingly this was my most popular post on Google+ ever with over 130,000 views and nearly 2,000 +1′s.

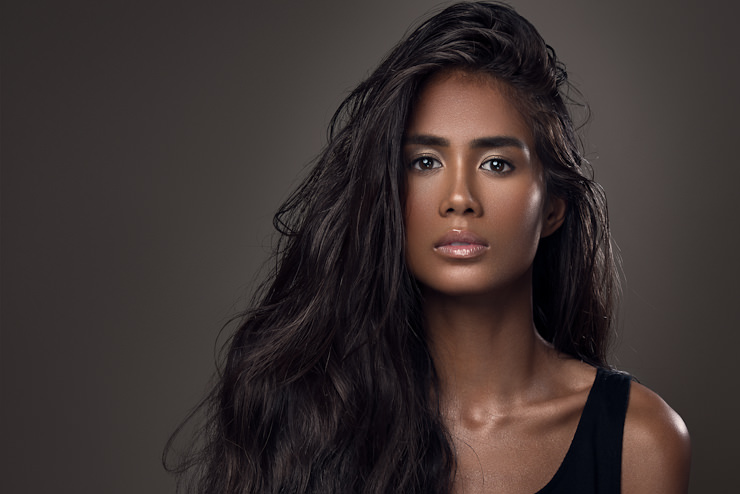
11. Confidence

Certainly up there as one of my favourite portraits of the year, this one just seems to embody my style of lighting and retouching really well. I really enjoy shooting portraits in landscape mode and this photo reminds me of why. The area of negative space seems to draw me further into the subtle expression of the model while providing a bit of breathing room for the eye to wander.

Portrait, Model Test, Toronto

Sam, Plutino Group, Beauty Shot, Toronto12. One-Sided

During a recent beauty shoot I decided to dabble with the use of hard, punchy light sources like small, gridded reflectors to create very defined and sharp shadows. It’s not a light source that you can use on every shoot due to its unforgiving nature but my model Sam pulled it off perfectly. To further experiment, it was my first time using a macro lens for portraiture so I decided to take advantage and get in nice and tight. In the end the hard light and tight crop looked great together and so I finished it off with a clean retouch to preserve the models natural beauty and impeccable make-up artistry.

Sam, Plutino Group, Model Portrait, Toronto13. Sam

I’ve been experimenting with shallow depth of field in a studio setting quite a bit this year and this is the result of one of those experiments. What I love about photos like this is that it was taken before the actual shoot began, with no make-up, no hairstyling, one light and less than five minutes. The model nailed the expression and retouching time was mostly spent on colour grading to remove some of the colour cast created by the 3 stop ND filter that I used in order to open up my aperture.

Marina, Spot 6, Model Portrait, Toronto14. Marina

Similar to the above, this is one of those 5 minute shots with no hair or make-up. My model came in, sat down and we knocked these out in no time at all. Once again, processing remained minimal with just dodging & burning and colour grading. Interestingly enough the simple portraits have proven to be some of my favourite and most popular ones.

Andrea Spot 6, Fashion Portrait, Toronto15. Intensity

Whenever I shoot full length or 3/4 length fashion I always like to go in for a few close shots. Using rather large diffuser gives a nice light across a wide area but rarely does it give you a very precise and controlled result. In this case the model nailed the expression and found herself in that sweet spot of light that brought it all together.

Zoe, B&M Models, Beauty Portrait, Toronto16. Zoe

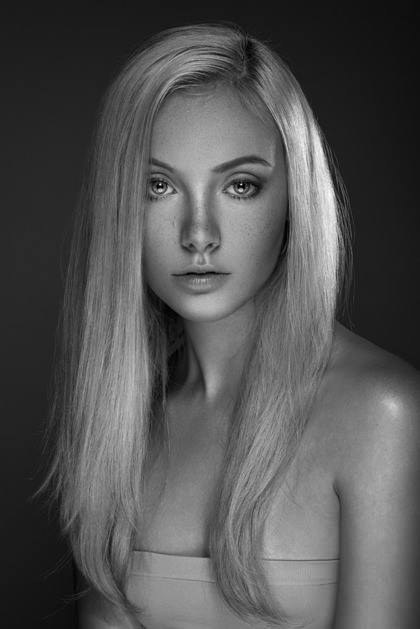
I love shooting contrasty B&W portraiture and this model just suited the style perfectly. Freckles always seem to come out well in B&W and her subtle expression is engaging and mysterious at the same time.

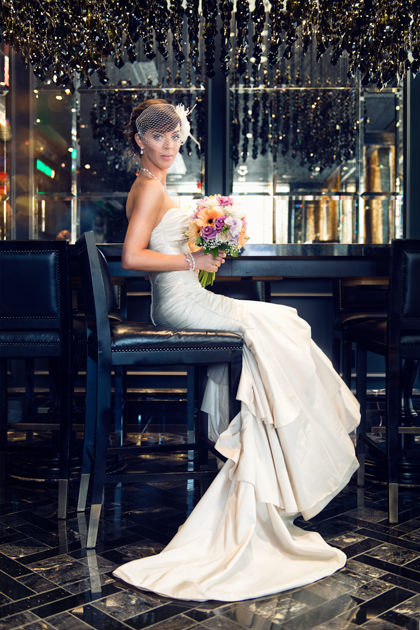
Wedding Photo, Trump Hotel, Toronto17. My Bride

I’m by no means a wedding photographer, but I certainly couldn’t resist taking photos at my own wedding. While my beautiful bride and cool location did most of the work in making this image great, I’ll still take a little bit of credit for pressing the shutter. It was all natural light with a bit of dodging and burning applied in post processing to finish it off. In case you’re wondering, we did hire a wedding photographer to shoot the majority of it. I did have to be in some of the photos after all.

18. Anabel

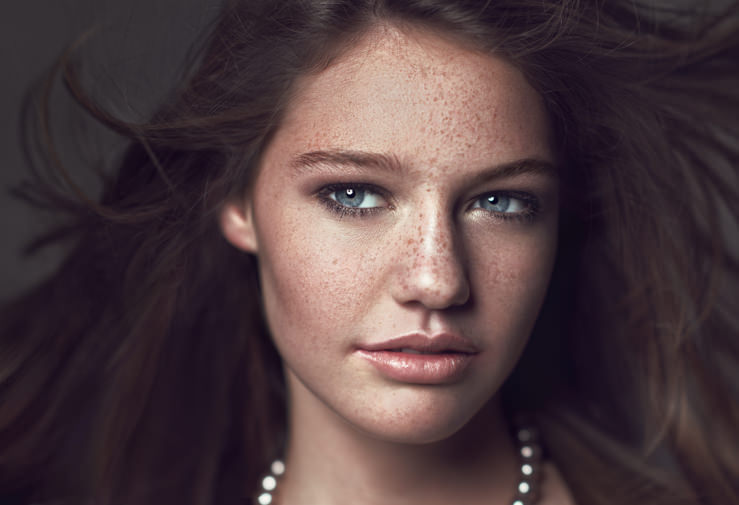
One of my earliest and still favourite experiments with shallow depth of field studio portraiture. As with all my shallow DOF work, it’s a one light setup, throw in a great model, some freckles and some blowing hair and you’ve got a winning combination.

Studio Portrait, Anabel (Wilhelmina Models), Toronto

19. Summer Glow

Part of the same shoot as above, this a strobe lit outdoor portrait with a natural processing applied to it. With lots of praise from Peter Hurley, I had include this photo in my list. A full tutorial on how it was edited can be found here.

Outdoor Model Portrait, Anabel (Wilhelmina Models), Toronto

20. Melancholy Pearl

A fairly atypical style for me as I rarely shoot lower contrast, desaturated and high key images but this model was just the perfect fit for it. The key for it was just a ton of soft and wrapping light. For this one I used a huge 7′ octa as a main light and 4 lights and two silver reflectors in total.

Beauty Portrait, Zoe (B&M Models), Toronto

As I look back at my 2012 post it’s nice to see the improvement I’ve made in my work over 2013 and hopefully I will be able to say the same thing in 2014.

The post The Best of 2013 appeared first on Vibrant Shot Photography.

Complete Guide to Eye Retouching

$
0
0

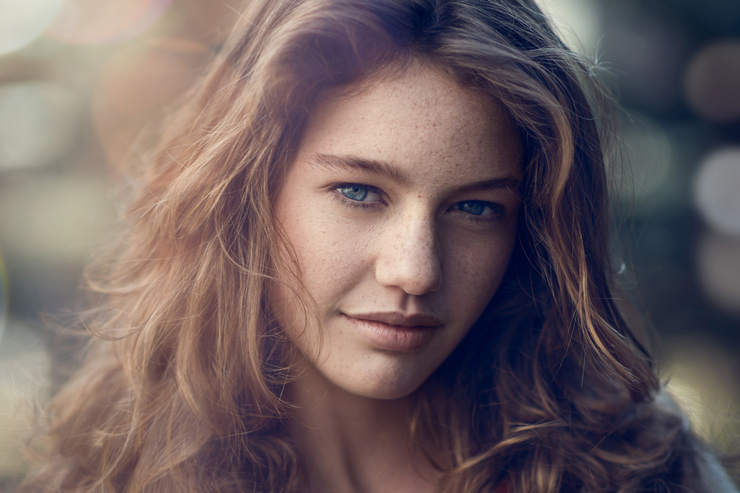
In this series of video tutorials I’ll be taking you through some of the most common techniques used for retouching eyes in both beauty shots and portraits.

The series is broken down into five parts and spans nearly an hour in length. We cover a wide variety of tools in the process (most available in Photoshop CS3 and onward) including:

  • Frequency separation
  • Healing brush and clone-stamp tool
  • Curves and exposure adjustments
  • Selective hue/saturation adjustments
  • Selection tools and transformations
  • Liquify
  • Colour and sharpness matching
  • Various sharpening tools

The eyelash and eyebrow brush preset used in part 5 can be downloaded here.

Part 1 – Sharpening Eyes

Part 2 – Removing Hair, Redness and Veins in Eyes

Part 3 – Brightening Eyes

Part 4 – Resizing and Repositioning Eyes

Part 5 – Adding and Enhancing Eyelashes and Eyebrows

Thanks for watching and don’t forget to subscribe to my YouTube channel for more updates!

The post Complete Guide to Eye Retouching appeared first on Vibrant Shot Photography.

How to Save and Sharpen Photos for Social Media and the Web

$
0
0

In this video tutorial I’ll be covering a topic that I get asked about often: how do I output my images to make them look good on the web and on social media sites like Facebook, Google+, 500px, etc.

We’ll be going over two examples, one portrait and one architecture image and cover a number of topics including:

  • Metadata
  • Optimal resolution
  • Sharpening to preserve detail and skin texture
  • Downsampling algorithm selection
  • Effective use of image noise
  • Watermarking
  • File size reduction

While Photoshop CC is offers one of the best downsampling options, I will show you how to export if you’re using an older version of Photoshop as well.

Thanks for watching and don’t forget to subscribe to my YouTube channel for more updates!

The post How to Save and Sharpen Photos for Social Media and the Web appeared first on Vibrant Shot Photography.
How To Quickly Remove Color Casts In Photoshop

$
0
0

In this short video tutorial, I’ll show you a quick, intuitive and consistently effective method for removing a colour cast from your images. This technique will work for any type of image, not just portraits.

While Photoshop offers a number of tools that help with colour cast removal, such as the channel mixer, selective colour, curves, etc., none are are ever that simple to get right and they always seem to alter the overall colouring of your image as you try to remove the offending colour cast. Here we take a simple approach using solid fill layers and blend-if sliders.

This technique only uses a few basic functions so it will work in all versions of Photoshop.

Thanks for watching and don’t forget to subscribe to my YouTube channel for more updates!

The post How To Quickly Remove Color Casts In Photoshop appeared first on Vibrant Shot Photography.
How to Quickly Remove Stray Hairs in Photoshop

$
0
0

In this tutorial I’ll show you a shortcut for removing stray hairs from a background. This trick will work well if the background is a seamless paper with a tonal gradation across it, or is blurred out due to shallow depth of field. If your background has a lot of detail or texture in it then the technique will not work. Another situation you may run into problems is if you have a blonde model with brightly lit fly-away hairs on a very dark background or black hair on a near white background.

Generally this approach should allow you to tidy up stray hair issues like those shown here in a few minutes as opposed to individually cleaning up each strand and spending upwards of 30 minutes on it. Photoshop CS3 and beyond is needed to make it work.

While I used a seamless paper background with a light gradation in this video, the same technique can also be used for shallow DOF environmental portraits like the one shown below. Thanks to my friend Dani Diamond for letting me use his great image to test out this approach. Here we have a rather challenging scenario that would require a great deal of time to resolve using traditional methods.

Dani Diamond Stray Hair Removal Before

Without spoiling the solution in the video, my hint for how to approach an image like this is to use the same techniques as used for the seamless paper background but use two separate blur settings for the right and left sides of the subject. If one radius and threshold setting doesn’t work for you, use different values for various areas and mask them in as needed. This image took about twice as long as the one shown in the video due to the more complex scenario presented.

Courtesy: Dani Diamond Photography

No without further ado, here is how you make it happen.

Thanks for watching and don’t forget to subscribe to my YouTube channel for more updates!

The post How to Quickly Remove Stray Hairs in Photoshop appeared first on Vibrant Shot Photography.
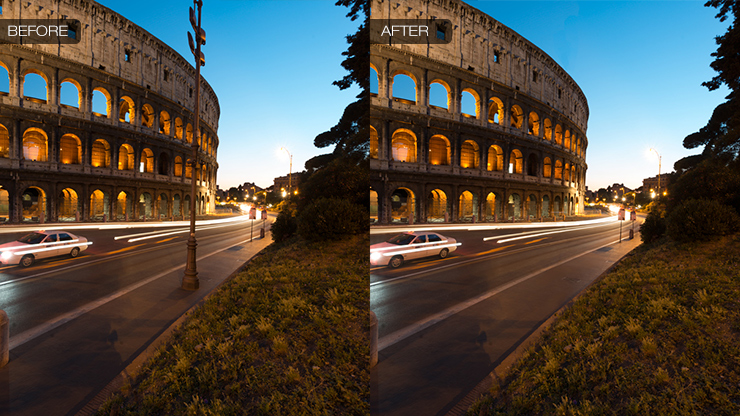
How To Enhance Texture and Detail with Intelligent High Pass Sharpening

$
0
0

In this tutorial I’ll show you a unique approach to high pass sharpening that will help to bring out details like skin texture and other fine elements for portrait, architecture or landscape images. The benefit of this approach is that it prevents the harsh transitions and fringing in high-contrast areas often seen in the traditional high pass approach.

In the video I’ll demonstrate the process for actually performing the sharpening but for ease of use, I’ve created an action for making it nice and simple. Click here to download the action.

The action and technique will work in Photoshop CS3 and beyond and I do highly recommend using it in 8 bit mode to ensure that it runs in a timely manner. 16 bit will work but takes some time due to slow Photoshop algorithms.

Thanks for watching and don’t forget to subscribe to my YouTube channel for more updates!

The post How To Enhance Texture and Detail with Intelligent High Pass Sharpening appeared first on Vibrant Shot Photography.
Viewing all 44 articles
Browse latest View live